5 DIY Valentine’s Day Card Ideas Kids Will Love
Plan a fun crafternoon with your little one and make these 5 DIY Valentine’s Day card ideas that kids will love! Surprise the class with these sweet Valentines packed with rubber duckies, hair ties, race cars and squeeze pouches! The printable templates make these cards easy to DIY. Plus, each card has only five steps or less so you can create a batch of cards in an hour tops. Grab scissors, a hole punch, glue stick, some card stock, decorative strings, the individual card themed items and get crafting!
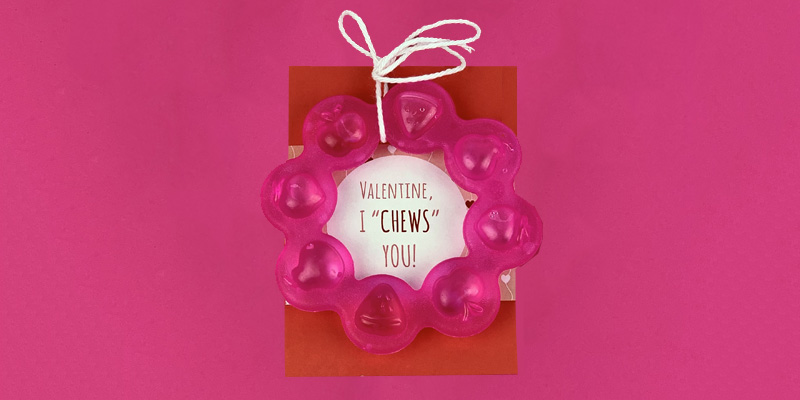
Card #1: “Valentine, I Chews You!”
What you’ll need: Card template, scissors, glue stick, red or pink card stock paper, decorative string, hole punch and teether rings for each card.
- Step 1: Download our free printable template
- Step 2: Cut out each of the cards and trim the edges
- Step 3: Glue the card onto a red piece of cardstock paper, cut to a size bigger than your card. Position it into the middle of the cardstock.
- Step 4: Punch a hole into the top of the card.
- Step 5: Position your teether so that the Valentine’s Day message is in the middle of the chew. Take a piece of white string, and tie the teether onto the card with a bow at the top. And that’s it! Repeat steps one through five for all of the remaining cards.
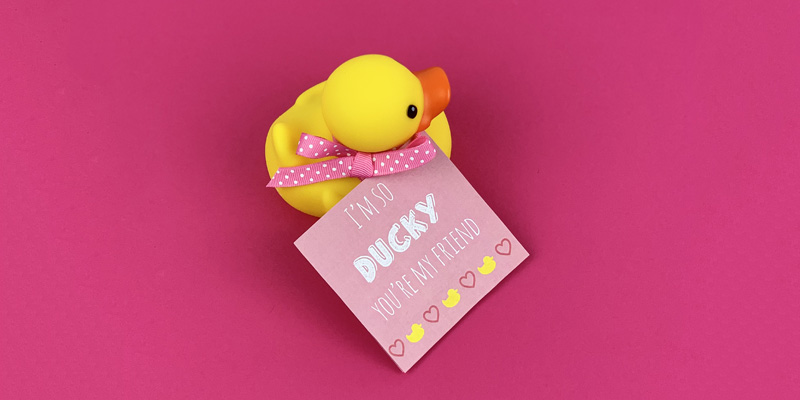
Card #2: “I’m So Ducky You’re My Friend”
What you’ll need: Card template, scissors, glue stick, red or pink card stock paper, decorative string, hole punch and rubber ducks for each card.
- Step 1: Download our free printable template
- Step 2: Cut out each of the cards and trim the edges
- Step 3: Glue the card onto a hot pink piece of cardstock paper, cut to a size equal to your card.
- Step 4: Punch a hole into the corner of the card.
- Step 5: Thread a piece of decorative string through the hole in the card and tie it in a bow around the plastic rubber ducky’s neck. And that’s it! Repeat steps one through five for all of the remaining cards.
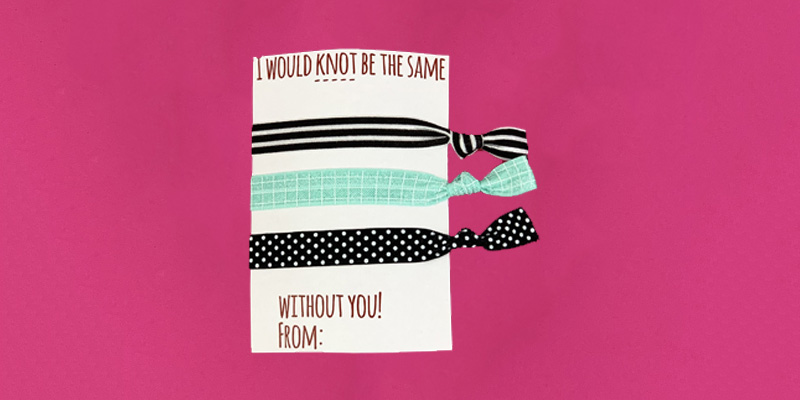
Card #3: “I Would Knot Be the Same Without You!”
What you’ll need: Card template, scissors, glue stick, red or pink card stock paper, decorative string, hole punch and three hair ties for each card.
- Step 1: Download our free printable template
- Step 2: Cut out each of the cards and trim the edges
- Step 3: Glue the card onto a hot pink piece of cardstock paper, cut to a size equal to your card.
- Step 4: Wrap each of the hair ties around the middle of the card so that the Valentine’s Day message can be seen at the top and bottom.
- Step 5: Address the card to your favorite girlfriends. And that’s it! Repeat steps one through five for all of the remaining cards.
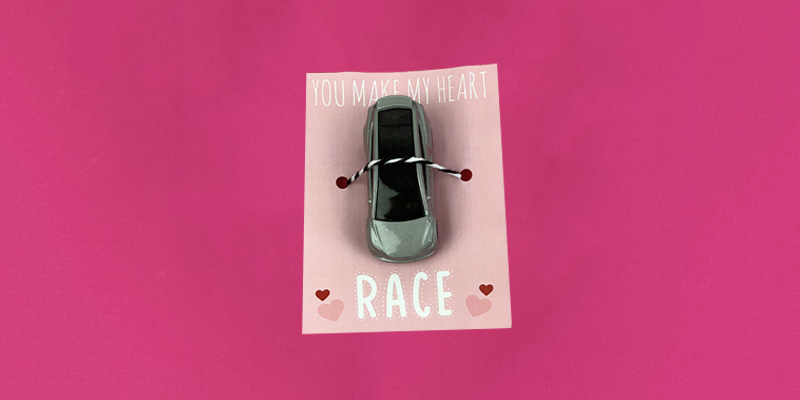
Card #4: “You Make My Heart Race”
What you’ll need: Card template, scissors, glue stick, red or pink card stock paper, decorative string, hole punch and toy race cars for each card.
- Step 1: Download our free printable templates: boys or girls
- Step 2: Cut out each of the cards and trim the edges
- Step 3: Glue the card onto a hot pink piece of cardstock paper, cut to the same size as your card.
- Step 4: Punch a hole into the left and right side of the card around the middle.
- Step 5: Position your car so that the Valentine’s Day message is at the top and bottom of the card. Take a piece of decorative string, and thread it through both of the holes so that the loop is on the front of the card and tie into a knot on the back. Position the car under the loop on the front of the card. And that’s it! Repeat steps one through five for all of the remaining cards.
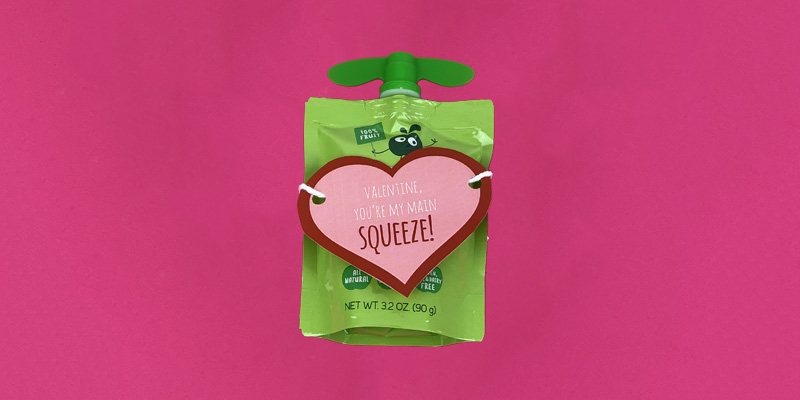
Card #5: “Valentine, You’re My Main Squeeze!”
What you’ll need: Card template, scissors, glue stick, red or pink card stock paper, decorative string, hole punch and juice squeeze pouch for each card.
- Step 1: Download our free printable template
- Step 2: Cut out each of the cards and trim the edges
- Step 3: Glue the card onto a hot pink piece of cardstock paper, cut around the heart shape and trim the edges.
- Step 4: Punch a hole into the left and right sides of the card.
- Step 5: Position your card so that it’s in the middle of the squeeze pouch and then thread a decorative string through both sides of the card and tie into multiple knots on the back of the squeeze pouch. And that’s it! Repeat steps one through five for all of the remaining cards.
Join the other 100,000+ new parents who love Bitsy Boxes.